Heroku Hosting
Learn how to actually make your bot works
Create a account#
You will create a Heroku account before anything
Creating an app and setting up#
Go to the right side of the page and click on New. Then select Create new app.
Give it a name. If the name you are giving has spaces put a -.
After your bot is created head on to Deploy.
Now click Connect to GitHub.
After that login into GitHub and type your forked repository name.
Click Search, if the repository below is the same click Connect.
Now, once you are done enable Automatic Deploys but do not deploy yet!
Configuration Variables#
After you are done with the part above go to Settings.
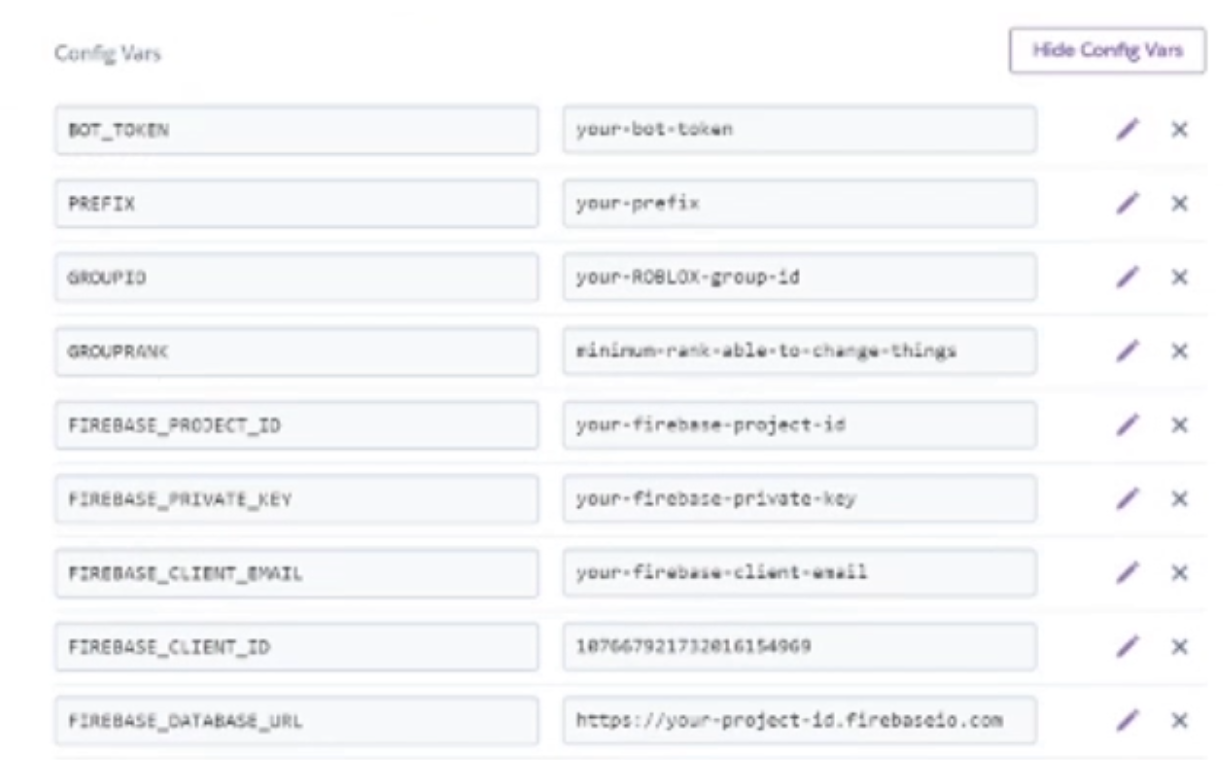
There you will click Reveal Config Vars. Here is where you will need your notepad file!
This can all be found at the notepad from Firebase.
Now here is what it should look like. (values are not done in this example just the variables)